
Tags
2 for 1 cocktails, alone cake, Art masterpiece cake, arty cakes, bar 55, be mine cake, camden bars, camden cake club, Chocolate cake with vanilla and meringue frosting, clandestine cake club, frosting, highgate press, home sweet home, hummingbird bakery, layered cakes, light cake, marble design, passion fruit cheesecake, picasso cake, rainbow pound cake, romantic cakes, sugar thermometer

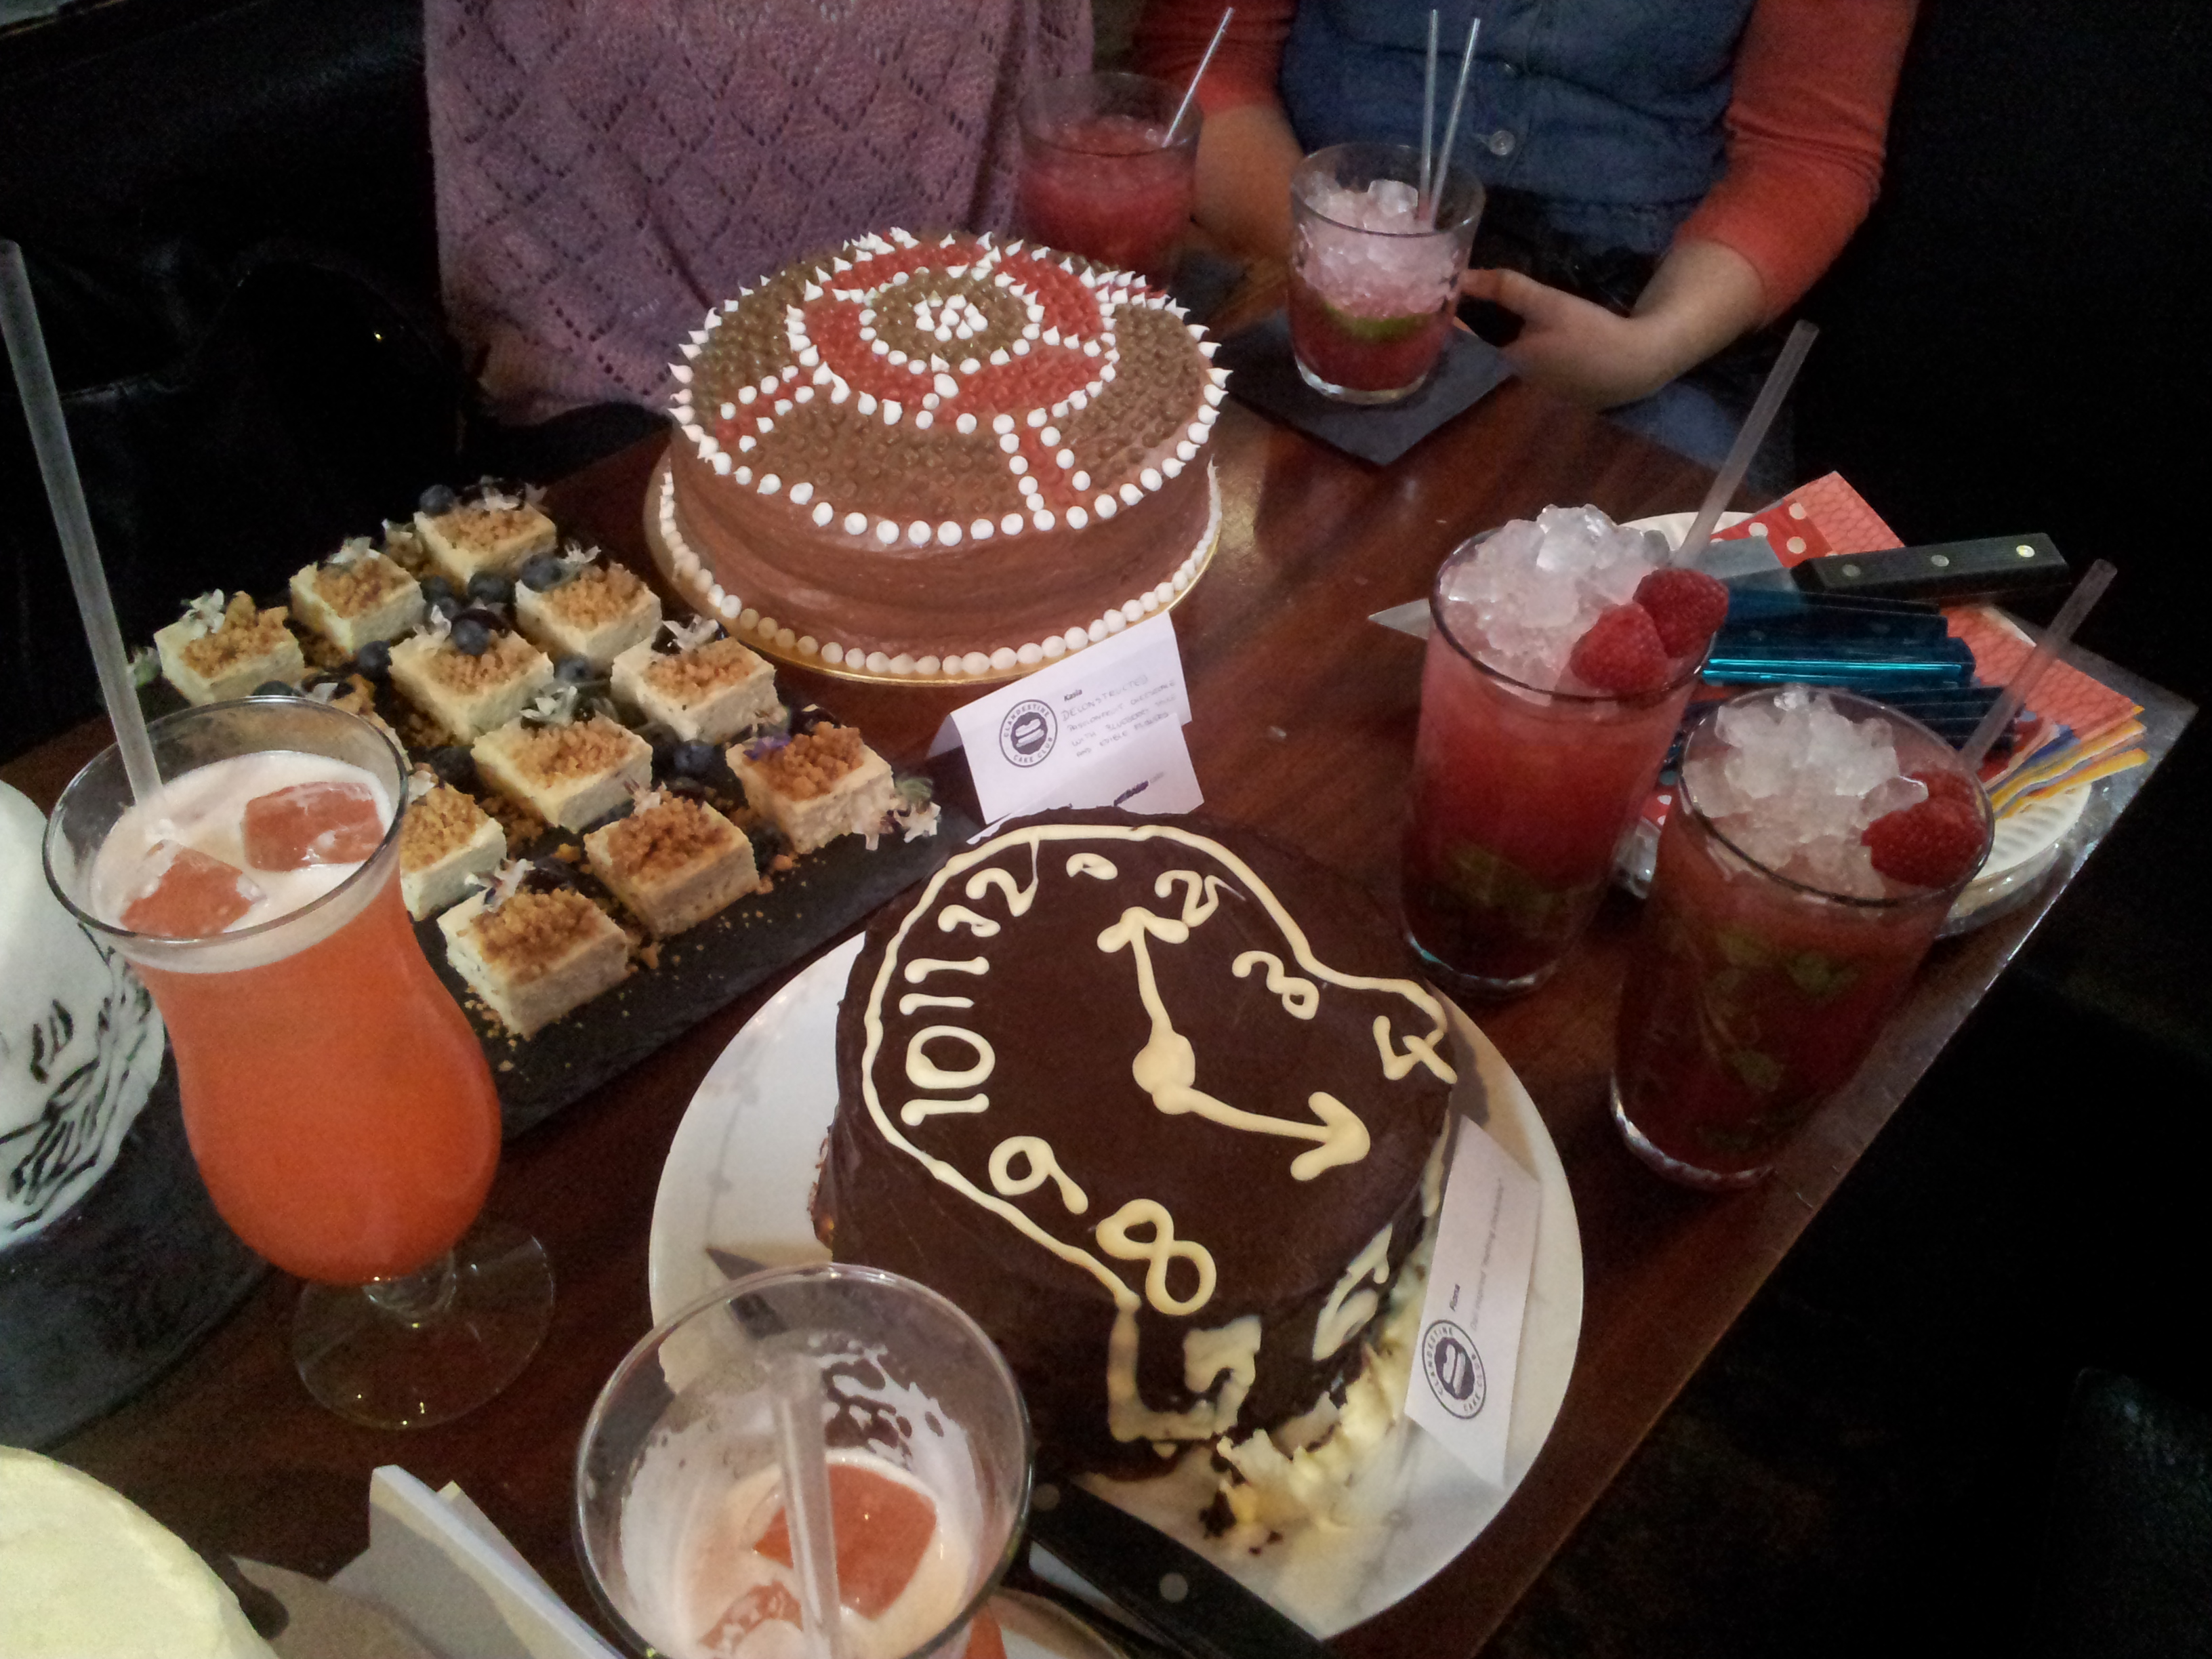
This month’s Clandestine Cake club theme was Art Masterpiece and wow were there some beautiful looking cakes! I arrived at Bar 55 in Camden (one of my favourite cocktail bars in London) and at 6.30 on a Monday it was already buzzing. The fact that cocktails are two for one all night on Mondays was probably a big reason for this! As I knew I was going to be scoffing my face with cake I decided before arriving that I wasn’t going to have alcohol- well that pretty much went out the window! As soon as I saw the others with Mai tai’s, Stawberry daiquiri’s and other delicious looking cocktails I knew I had to get one! Fiona, one of the cake club members ordered a beautiful looking raspberry mojito and despite the 50 times or so I have been to Bar 55 I have never had it so opted for one and it was sweet, refreshing and too easy to drink!
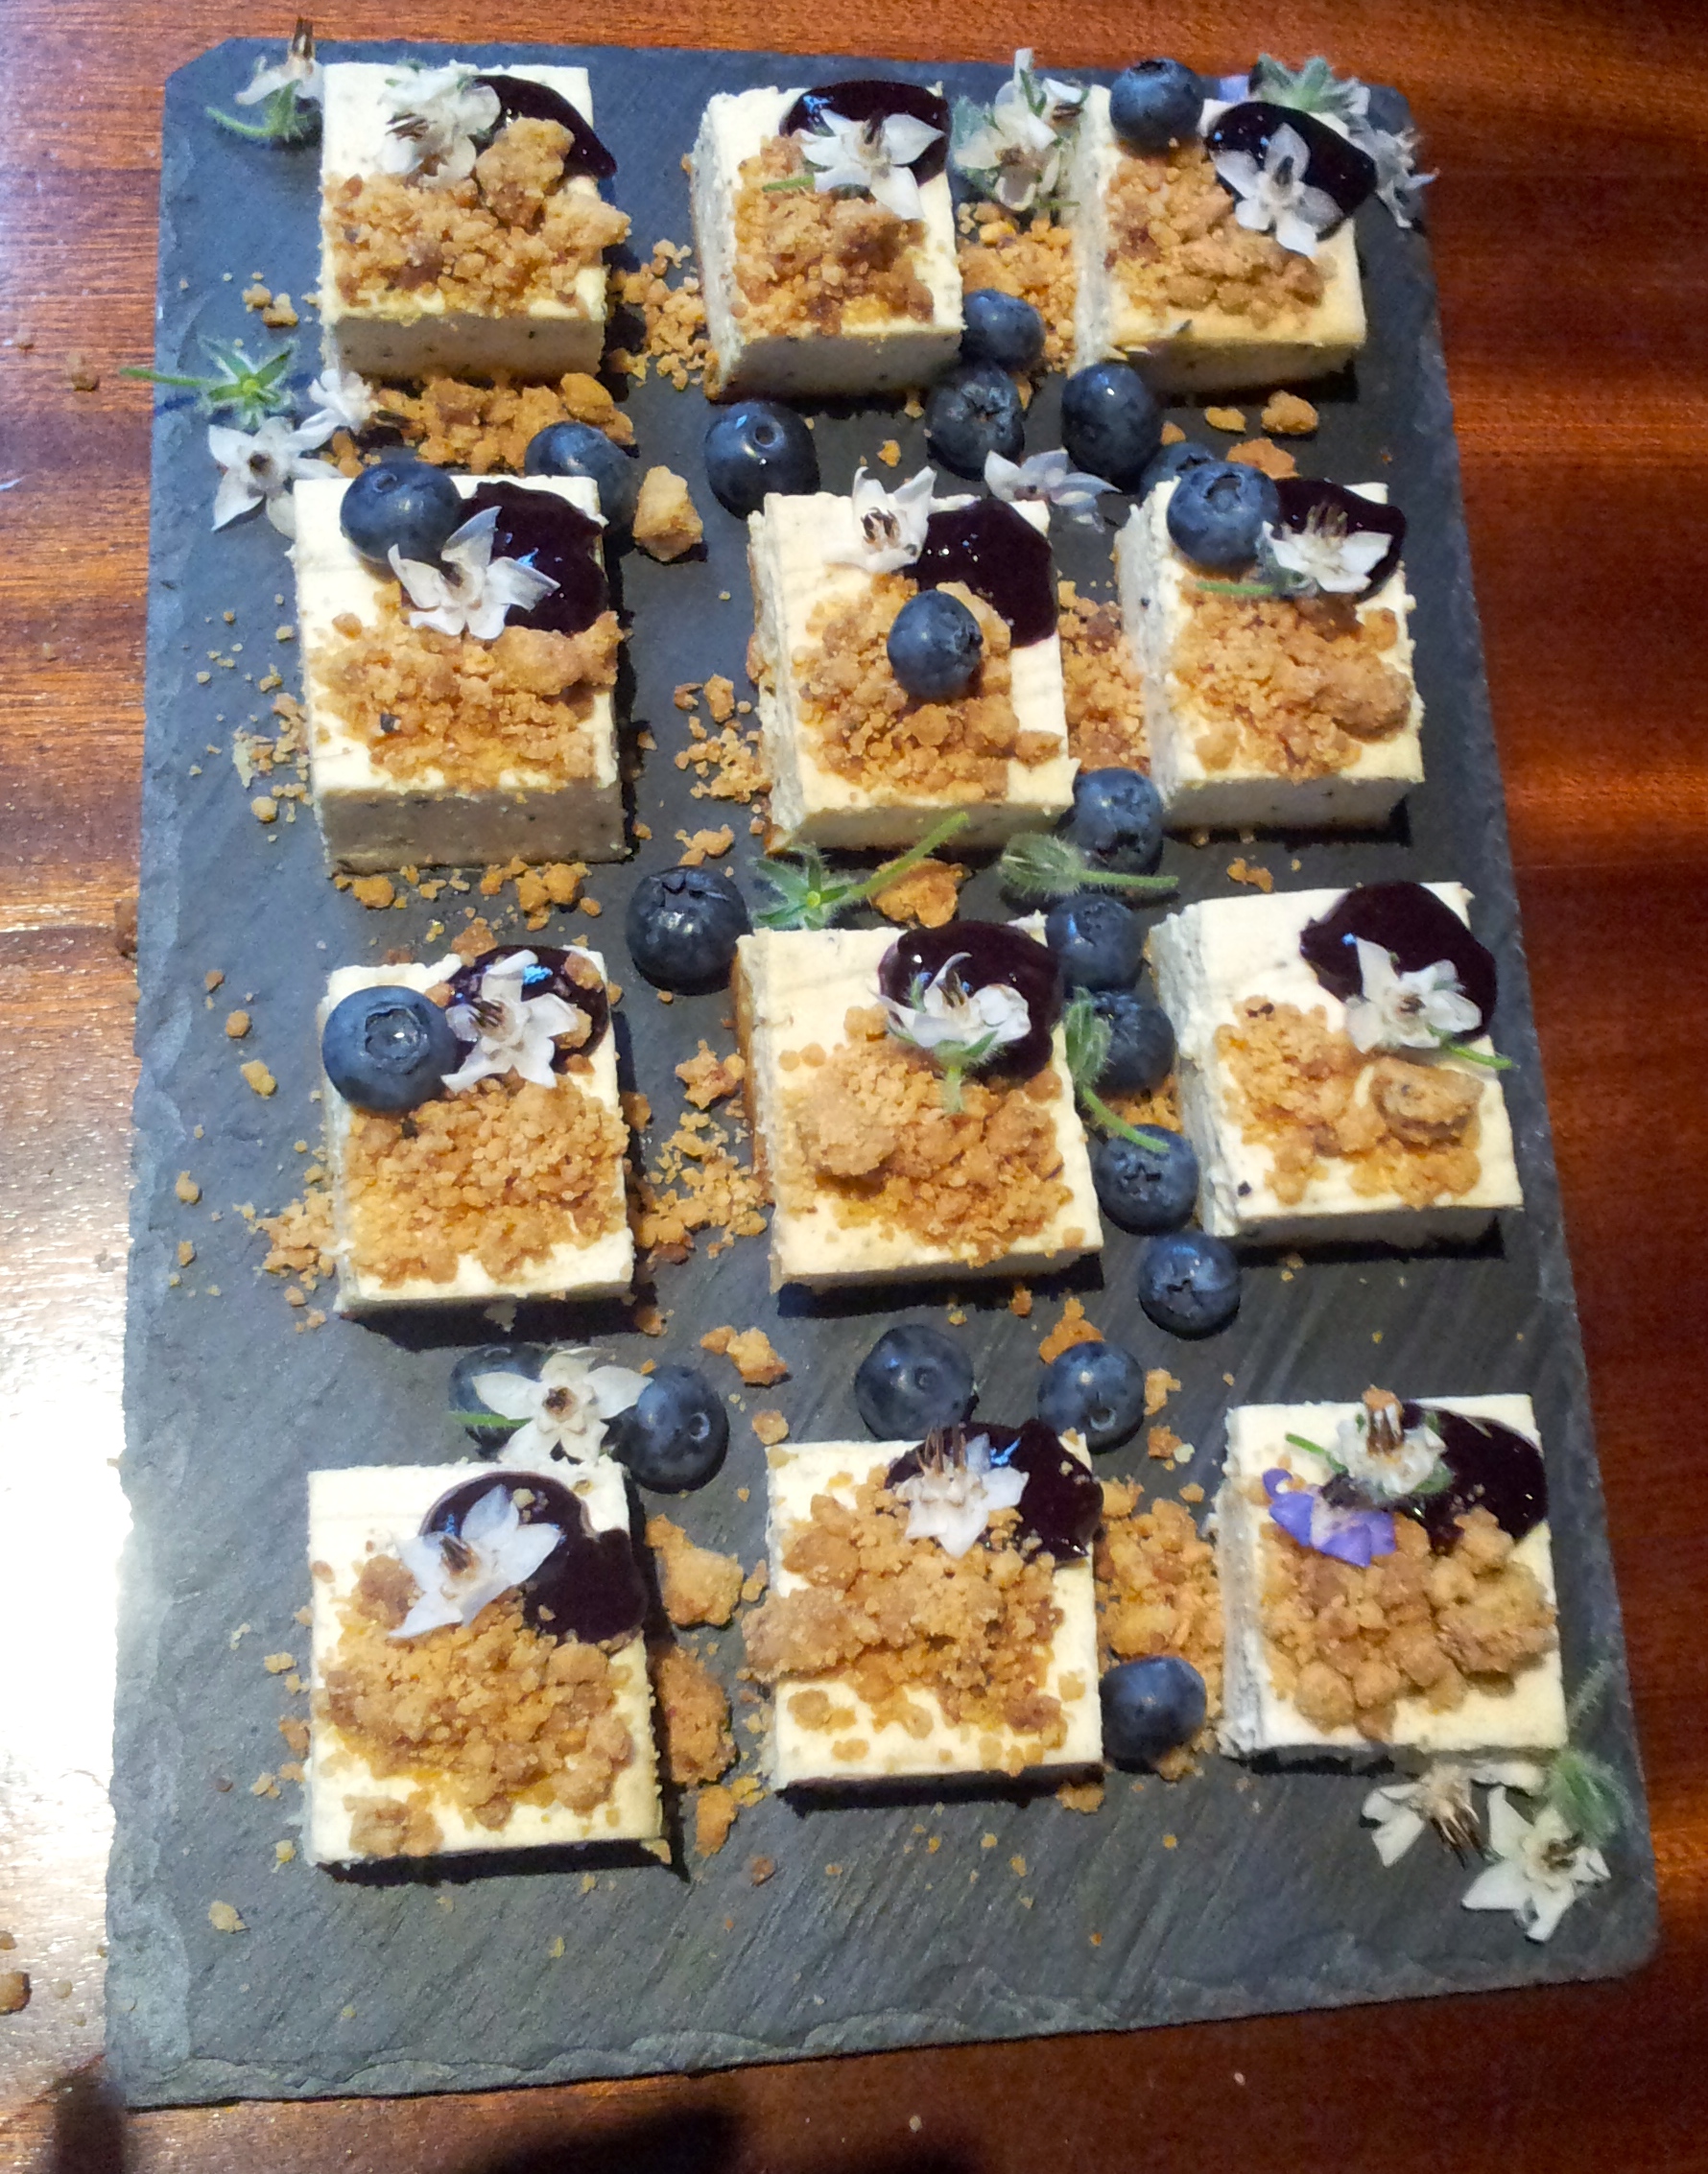
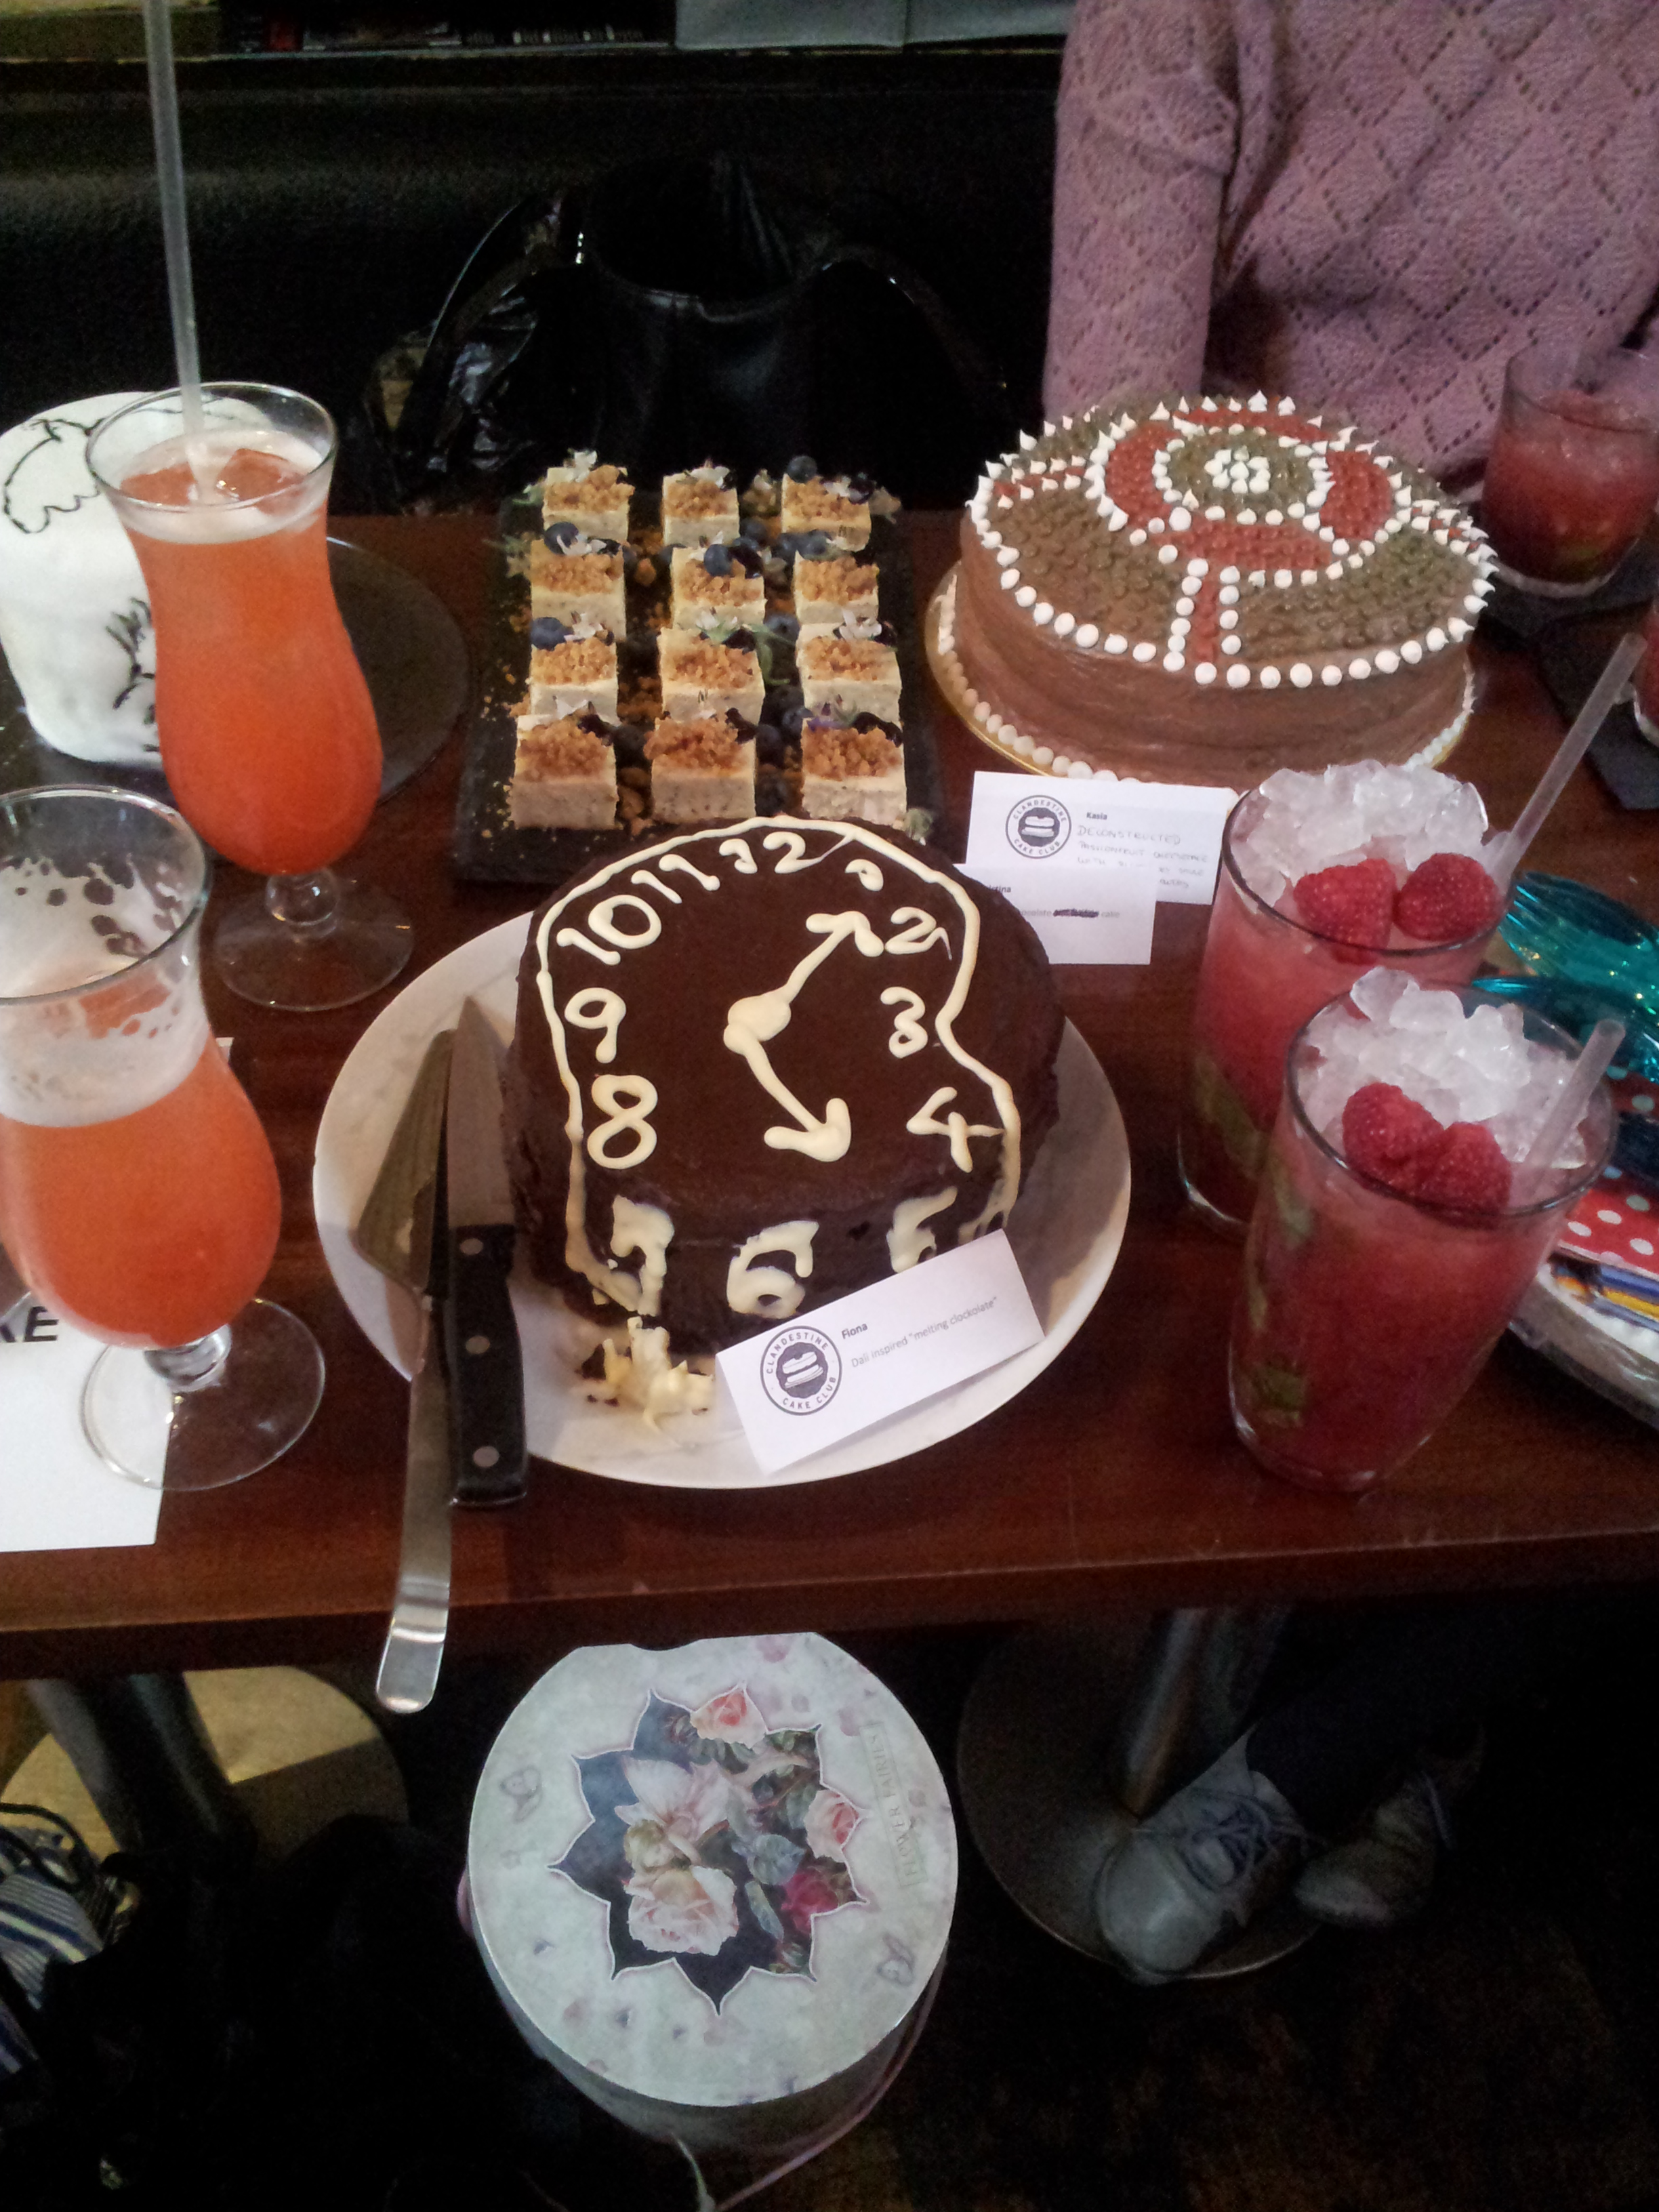
We had a table reserved in bar 55 and although a little cramped we managed to all squeeze on and place all our cakes on the tables. There was a chocolate Salvador dali clock cake from Fiona, Jelena’s humungous beautiful chocolate and vanilla cake, mini cheesecakes from Kasia , a rainbow pound cake from Lisa, an almond Picasso cake from Cat and finally an aboriginal chocolate and mango cake from Kristina.


The cake I decided to bake, literally two days before and ended up baking at 9pm Sunday night was from my new Hummngbird bakery cookbook, Home Sweet Home, which I was given as a birthday present (thank you Sibel). There are so many mouth watering recipes in this new book that not only includes cupcakes, but swiss rolls, cheesecake and pies. The cake I picked is the Chocolate cake with Vanilla Meringue frosting and I chose it due to its cool arty topping and simply for how delicious it looked in the picture. I also wanted more of a challenge (although at 9p.m it probably wasn’t the best idea!)
Decoration
60g milk chocolate
50g white chocolate
Sponge
170g unsalted butter, softened
350g soft light brown sugar
3 large eggs
80g dark chocolate (min 70% cocoa solids)
225g plain flour
1 ½ tsp bicarbonate of soda
½ tsp salt
225g soured cream
2 tsp vanilla extract
2 tbsp instant coffee mixed with 240ml boiling water
Frosting
300g caster sugar
80g golden syrup
120ml water
4 large egg whites
½ cream of tartar
1 tsp vanilla extract
Equipment
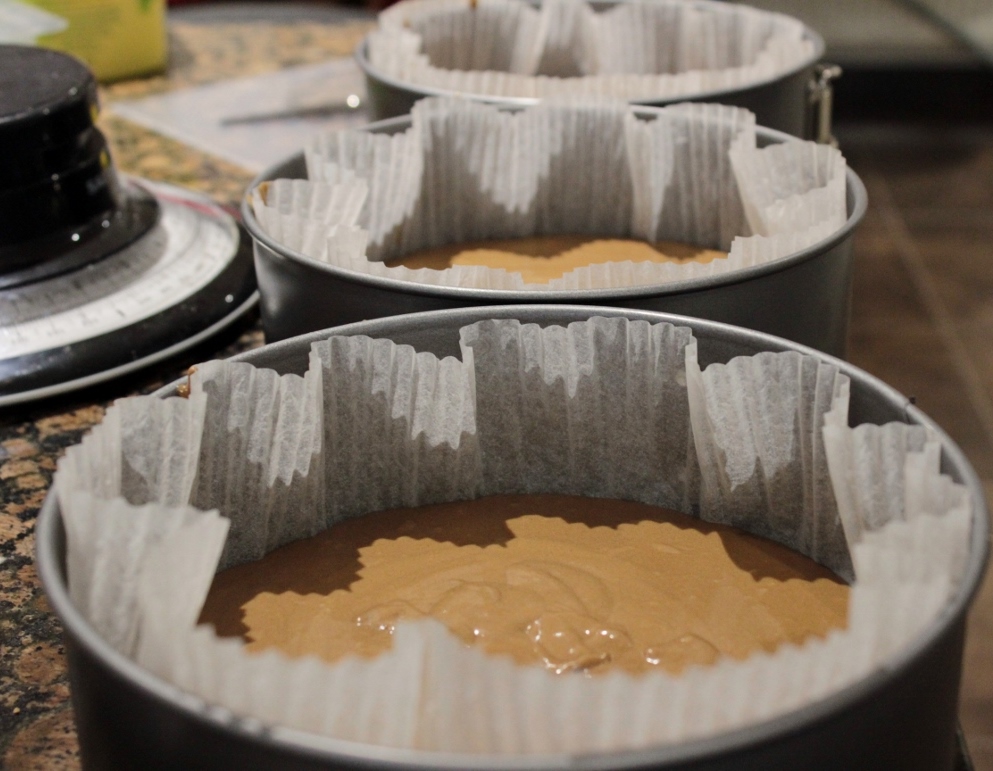
Three 20cm diameter loose-bottomed sandwich tins
sugar thermometer
sheet of plastic, such as laminating plastic
Method – decoration
1) Melt the milk chocolate and white chocolate separately in two small bowls, either in microwave-safe dishes in the microwave or set over small pans of simmering water.
2) Draw round the base of baking tin on the piece of plastic and cut out the round shape. Place on flat surface and place a blob of the melted milk chocolate in the centre and a blob of the white chocolate next to it.

Method – cake
4) Preheat the oven to 170ºC, 325ºF, gas mark 3, and line the cake tins with baking parchment.
5) Using an electric whisk, cream the butter and sugar together until light and fluffy. Add the eggs one at a time, scraping down the sides of the bowl and mixing well after each addition.

6) Melt the dark chocolate in a microwave-safe bowl in the microwave or in a glass bowl set over a small pan of simmering water. On a slow speed, pour the melted chocolate into the creamed butter and sugar mixture.

7) In a medium bowl, sift together the flour, bicarbonate of soda and salt. In a jug, mix together the soured cream, vanilla extract and coffee.
8) On a slow speed, add the dry ingredients to the creamed butter and sugar in alternating additions with the coffee mixture. Once everything has been added, scrape down the sides of the bowl and mix well to form a smooth, even batter.
9) Divide the batter evenly amongst the three prepared tins. Bake for approximately 20-25 minutes or until the sponge bounces back when lightly touched. Remove from the tins and allow to cool completely before frosting.
Frosting
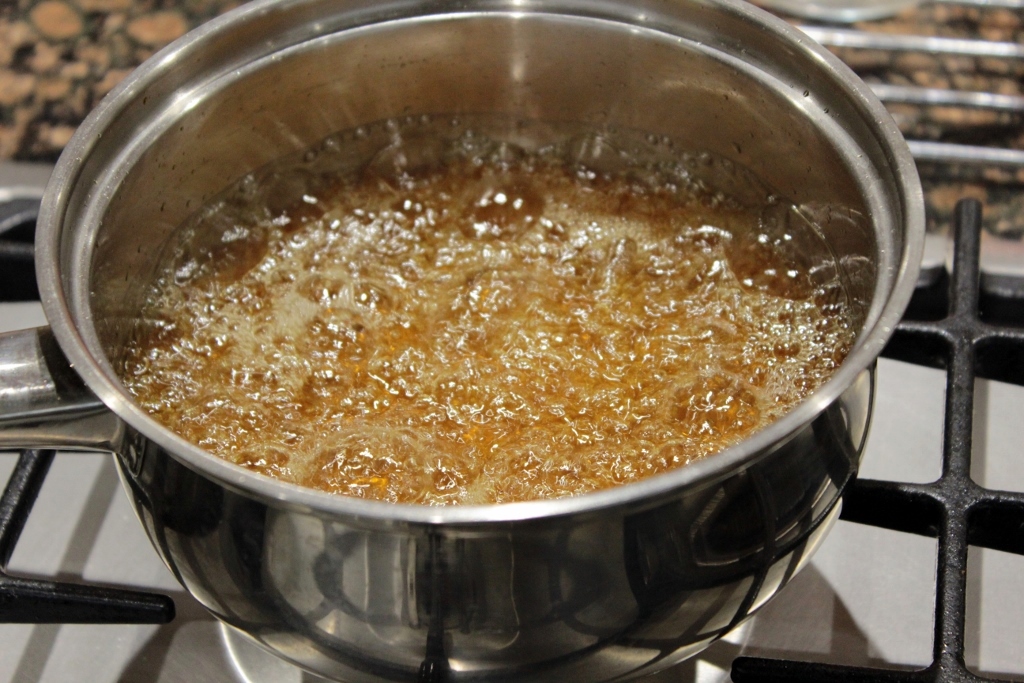
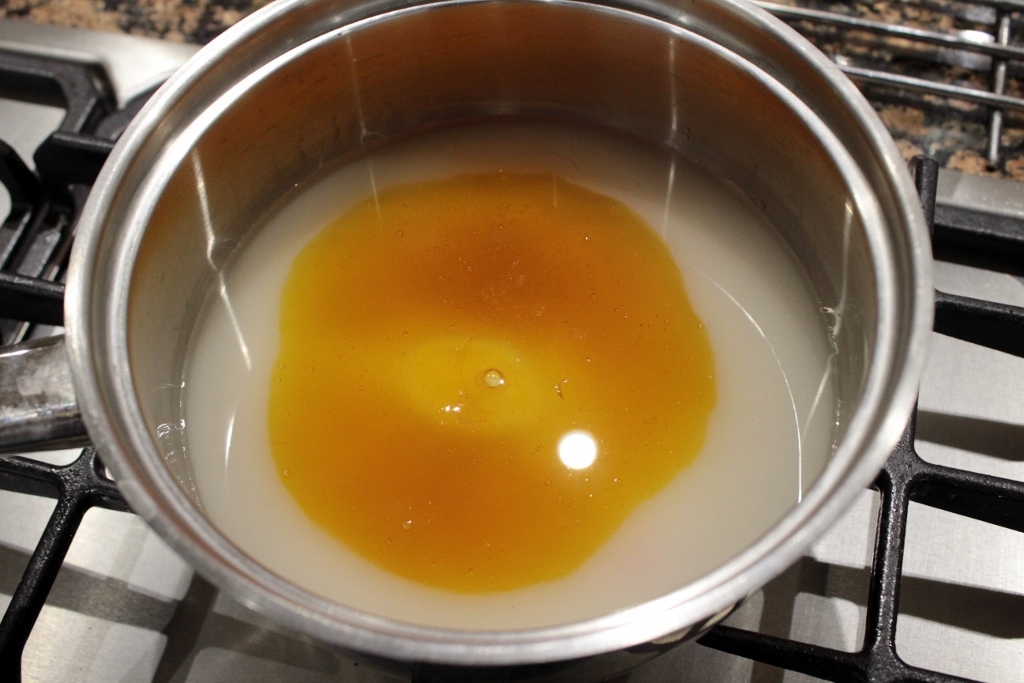
10) In a medium saucepan, dissolve the sugar and golden syrup in the water. Bring this to the boil. This must boil, without stirring, until the sugar reaches the soft ball stage (a little bit of the syrup dropped into cold water will form a soft ball). If you have one, use a sugar thermometer to check when it’s ready – it needs to reach 115ºC, 239ºF.
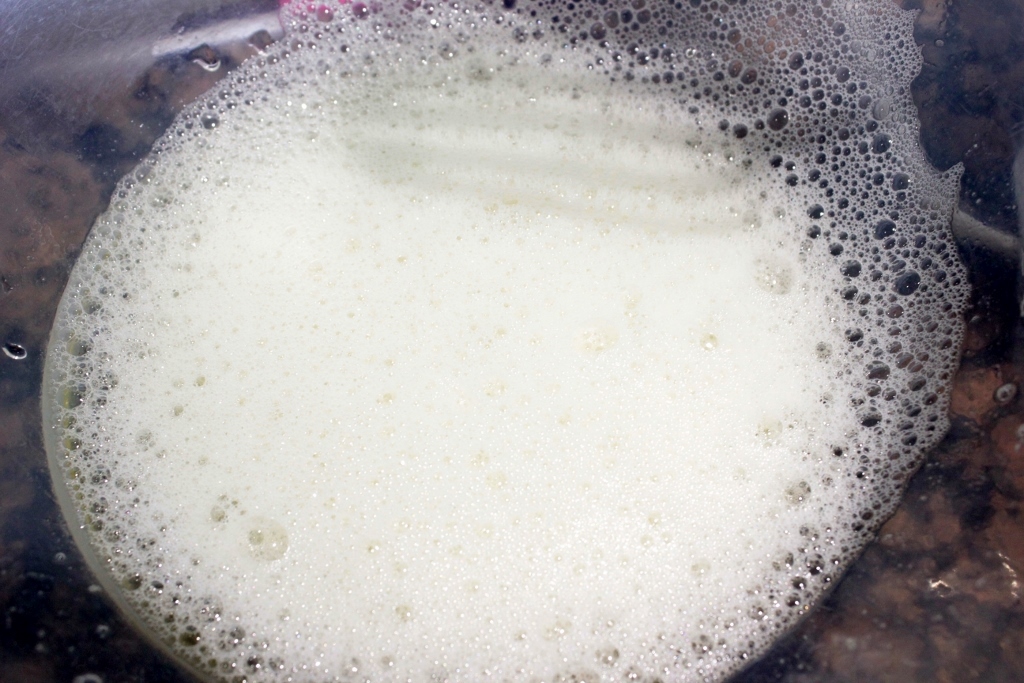
 11) Meanwhile, whip up the egg whites with the cream of tartar and vanilla extract. This should be whipped up only until it is just beginning to become white and frothy.
12) When the syrup is ready, carefully pour it onto the egg whites while the mixer or whisk is on a medium speed, gradually increasing the speed while pouring. Once all the syrup has been added, turn the mixer speed to high and let the meringue whip up. It will become very white and glossy and the bowl will be warm to the touch. Let it continue to mix until the base of the bowl has cooled to lukewarm.
13) Once the sponge layers feels cool to the touch, you can assemble and frost the cake. Place the first layer on a plate or cake card and top with 3-4 tablespoons of meringue frosting. Smooth the frosting out using a palette knife, adding a little more if needed. Sandwich the second layer on top, then add more frosting, followed by the third layer of cake.
14) Next frost the sides and top of the cake, covering it completely so that no sponge is showing.
15) Carefully peel the plastic off the chocolate disk and place the disk on the top of the cake to finish. If the chocolate disk breaks, this is absolutely not a problem – just break it into more pieces and decorate it with these.

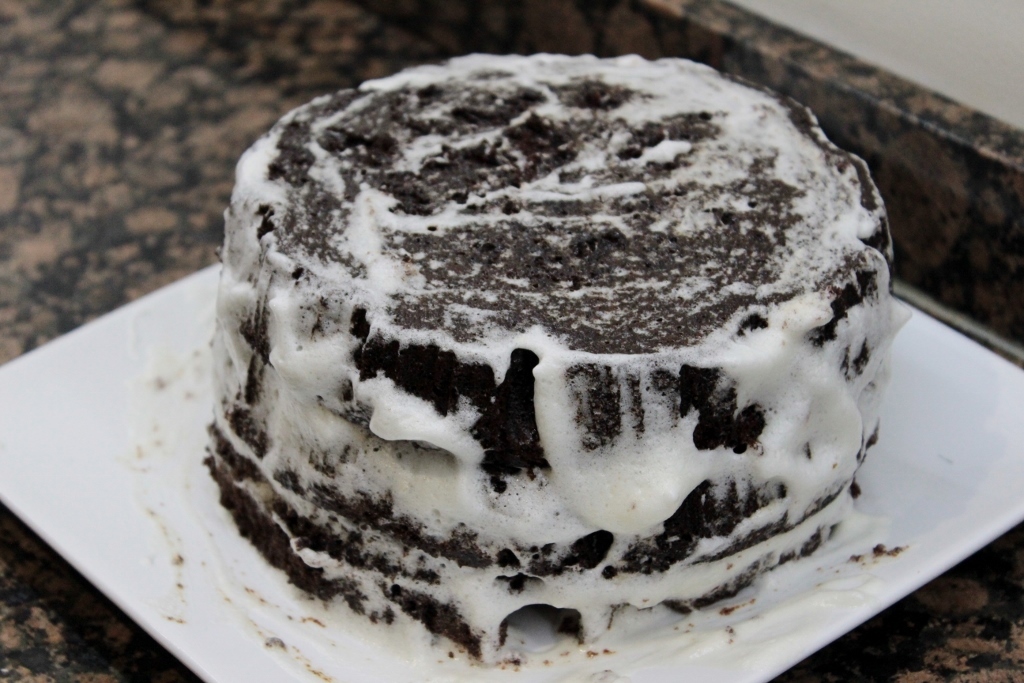
As you can see the frosting didn’t turn out as well as I’d hoped, rather it dissolved into the cake. The first time I made it the syrup was far too runny and make the egg mixture too runny to create a frosting. The second time I did it, it turned out much better however I didn’t make enough of it and therefore it didn’t cover the cake. Thankfully it still tasted nice, added extra flavour to the cake and although it didm;t cover the cake completely it created a sketchy art effect.
I was quite aware that the cake didn’t look my best however I just simply didn’t have enough time or enough ingredients left in the house to add to the mixture for the frosting. It just so happened as well that on this cake club event we had a photographer from the local paper down to take pictures and she wanted individual pictures of us with our cakes. Well, when I discovered this I thought, no chance, however it turned out to be good fun and look we made it in the paper!!
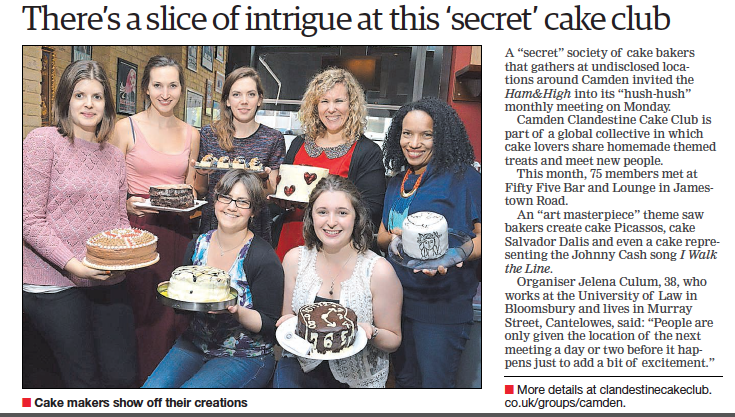 A few typos such as the number of people who attended (imagine that many cakes!) and also the event isn’t particularly secret but nevertheless it was a lovely surprise to find our club in the paper and it just shows the talented bakers in our club!
This cake club, although featured heavily with chocolate cake, was really lovely and had such a wonderful theme. Jelena’s huge cake cut beautifully to display her incredible layers inside and overall the taste of the cakes were so varied, I can’t wait until Autumn Harvest theme next month, can you believe it’s September already! At least cake will get us through the nights when it starts to get dark and many other nights too I’m sure!

